How to Export Data from AiPrise
Last updated: July 23, 2026
AiPrise allows you to export your verification data — including business sessions, cases, business profiles, and user profiles — as a CSV file for use in downstream processes.
Step 1: Open the Case / Profile Page
From your AiPrise dashboard, navigate to the page for the data you want to export:
On the Navigation bar, scroll to the relevant business, case, business profile, or user profile page
Click to open the list page.
Step 2: Click Export
On the top right of the page, click the Export option

Step 3: Apply Filters
Once the export dialog opens, choose the data you'd like to include:
Set a date range
(Optional) Filter by:
Result — Approved, Declined, Review, or Unknown
Risk level
Country
Tags
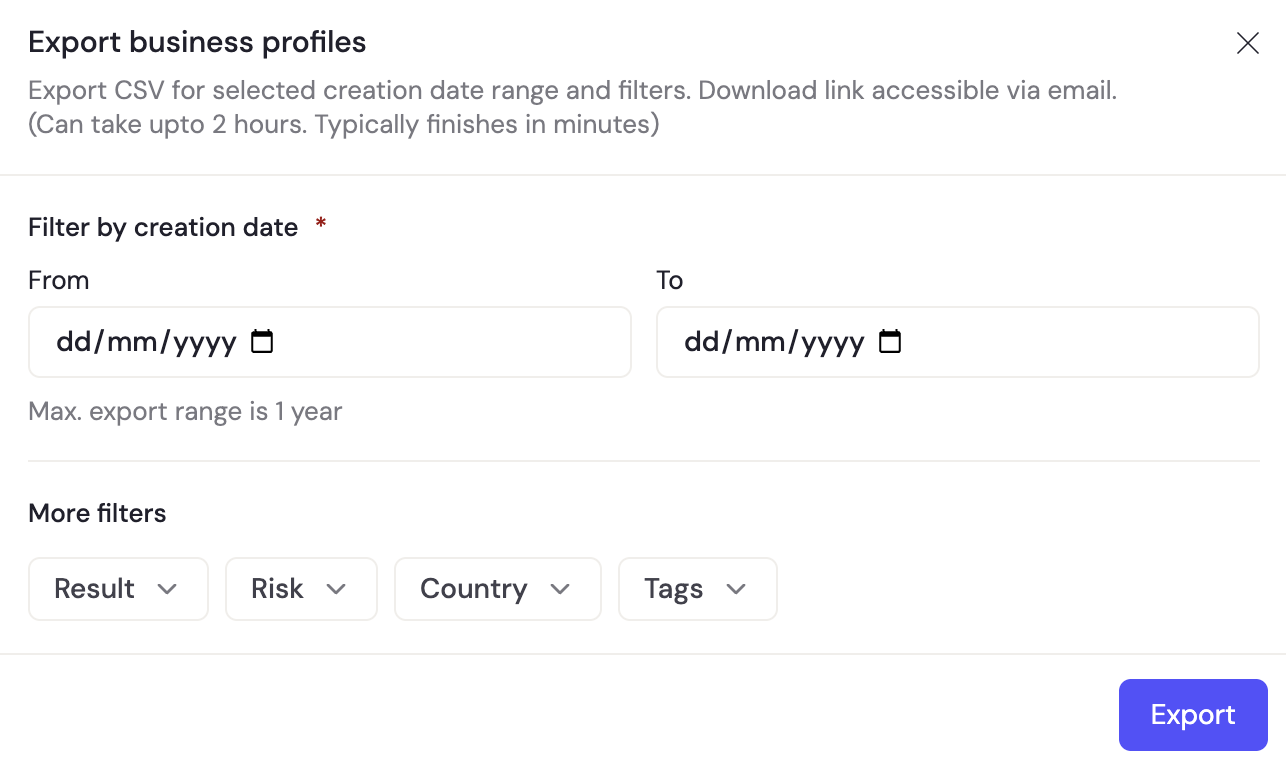
The maximum date range per export is one year. To export data beyond one year, run the export in multiple batches.
Step 4: Confirm and Send
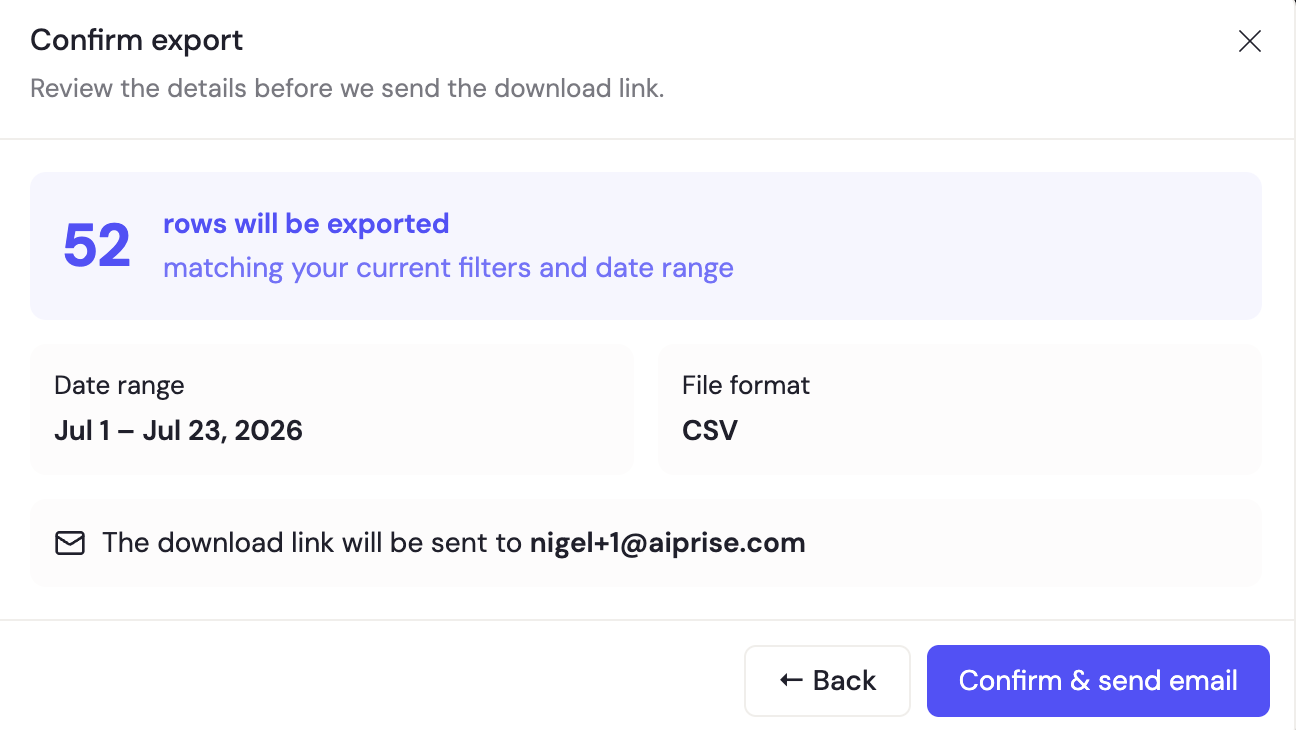
After clicking Export, you'll see a confirmation summary showing:
The number of rows to be exported (e.g. 52 business profiles = 52 rows)
The selected date range
The file format (CSV)
The destination email — the address you're logged into the dashboard with
Click Confirm and Send Email to start the export.
Step 5: Download Your File
The export is delivered by email to your dashboard address. You'll typically receive it within a few minutes.
Depending on the file size, delivery can take up to two hours. Currently, exports are available in CSV format only.